
Don’t Let Shoveling Stiffen Your Spine

During Colorado winters, most of us aren’t as active outdoors as we are in the summer (with the exception of snow sports like skiing and snowboarding). However, there’s one activity many of us have to get outside for whether we like it or not: shoveling snow. While shoveling can actually be a great workout, many of us find ourselves aching after we’re done.
The most significant soreness you’re likely to feel after shoveling is in your back. Snow is heavy, and because we tend to have a dominant side, we work our muscles asymmetrically while moving it. Here’s how we recommend recovering from the aches and pains of shoveling snow.
1) Relax your low back
Give your low back some love after it’s helped you with all that work. We love lying on the ground with the feet flat and putting a massage ball or two under the low back. You can either use Miracle Balls or the DIY version of two lacrosse balls bound with athletic tape. Be sure to place the balls on either side of your spine so they’re underneath the muscles, not the bone. Breathe deeply here. If it’s too much and you feel your muscles tensing rather than softening, try pressing into your feet to lift your hips up slightly. Lower your weight onto the balls just enough that you feel the muscles relax.

If you want more sensation, you can lift one or both feet off the floor, putting more of your weight onto the balls. You could even cozy up to a wall, extending your legs long and reaching your feet up towards the ceiling. Keep breathing deeply and stay as long as it feels good.
2) Roll down your spine
Take the previous exercise a step further and massage the muscles along the length of your spine. Lay down on your mat with your knees bent and feet flat. Place the balls at the very top of your spine, just below your skull. Exhale as you let your weight sink into the balls, feeling your muscles soften on top of the balls. Take a few breaths there, then shift your weight so the balls roll slightly down your spine (towards your tailbone). Continue like this, pausing often to take deep breaths, until you’ve rolled the balls all the way down your spine. Remember to keep the balls underneath muscle, not bone.
As you get towards your mid-back, you may feel that one side is speaking to you more loudly than the other. This is probably the side you worked more when shoveling. Give it some extra love by placing both balls on that side and taking some extra breaths.
3) Stretch it out
After you’ve rolled out your back muscles, give them a nice stretch.
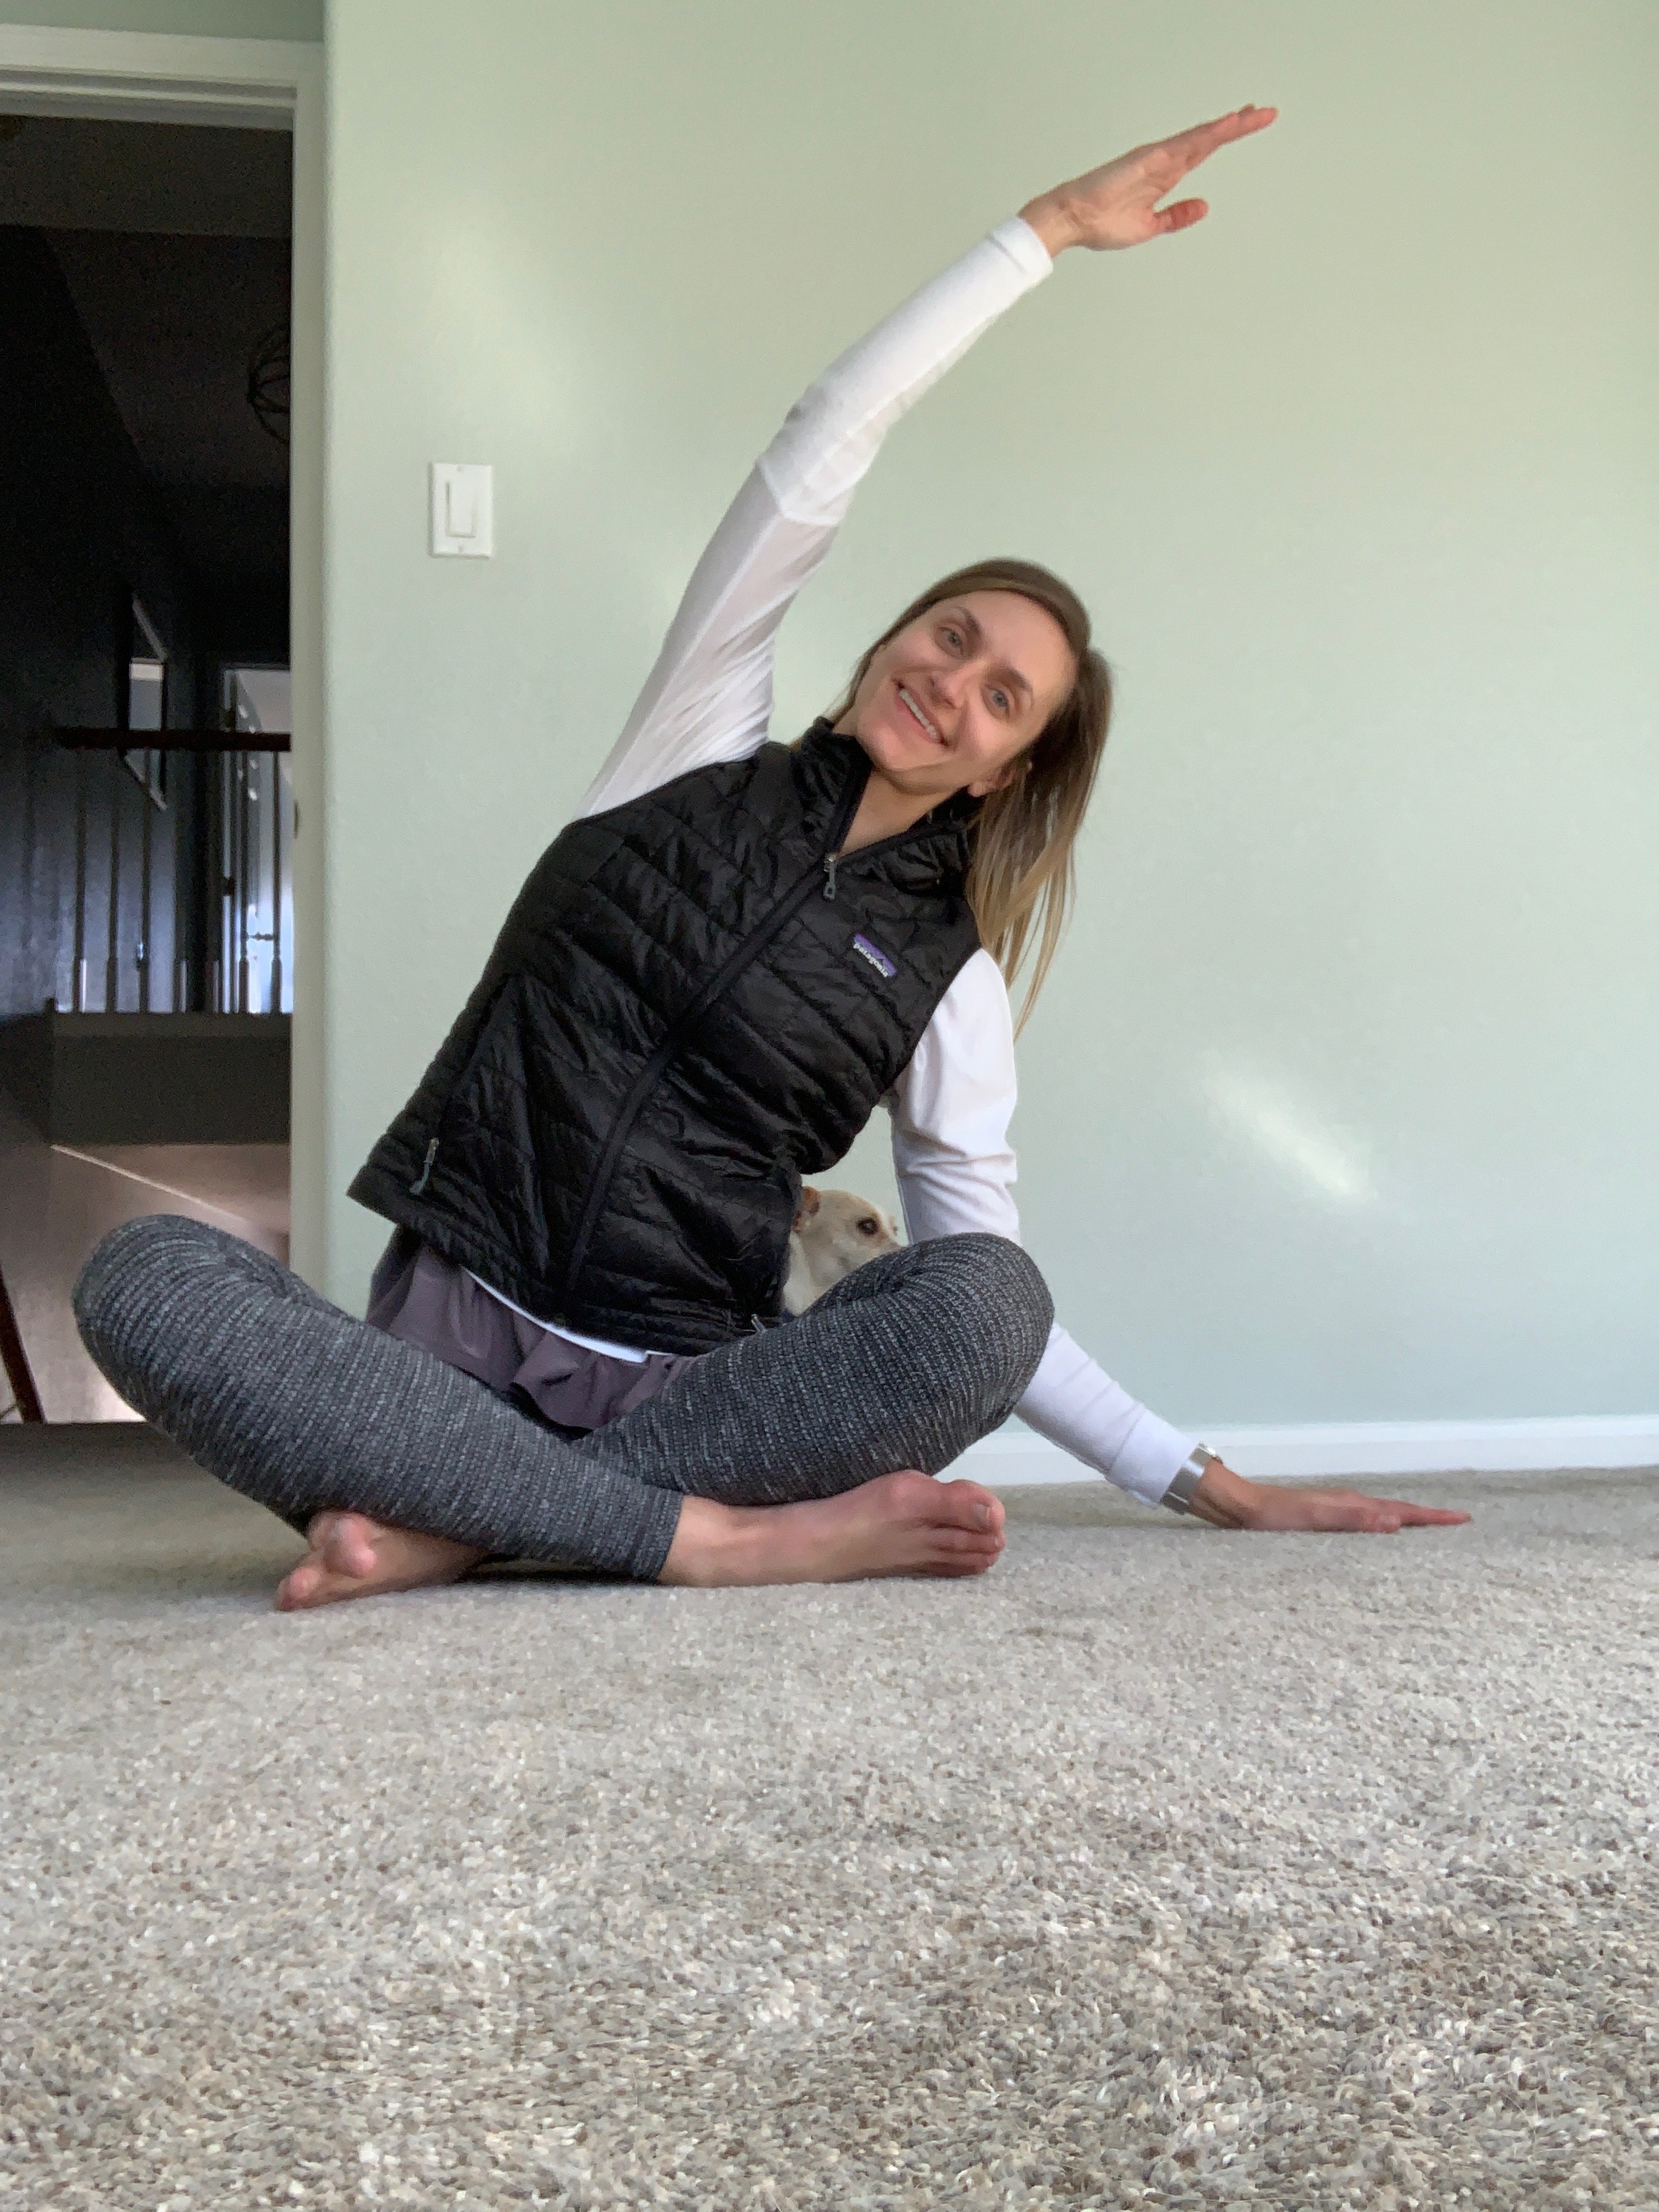
Sit on the floor with your legs crossed or extended out in front of you. (If neither of those options feel comfortable, you can do this seated in a chair.) Keep your spine long and try to keep equal weight in both sitz bones.
Do a side stretch by placing your left hand on the floor beside you (or on the edge of the chair) and your right arm up and over your head. Let your spine arc over towards the left side. Imagine your spine growing taller and longer to arc over rather than crunching down. Keep your right hip weighted down so your right cheek isn’t lifting off the floor. You should feel the stretch on your right side, maybe even all the way up to your neck.
Take the stretch further by rotating your chest and right arm slightly towards the floor. Don’t collapse; keep your spine long and spiral your chest towards the floor. The stretch should move from your lats (your side body) into your back. If this feels particularly good, you can place your right hand down on the floor and hang out for a few breaths.

Repeat on the other side. Again, you’ll probably notice that one side needs this stretch more than the other. Listen to your body and take extra time on that side.
To even yourself out, go into a ragdoll stretch. Stand with your feet hip-width apart and nod your chin into your chest to roll down through the spine. Keep your knees soft, letting your arms dangle by your ears and your head hang heavy. This can be used as a hamstring stretch, and if you need that feel free to enjoy it! To bring the stretch more into your back, bend your knees until you feel your back is getting more love than your hamstrings. Stay here and breathe.
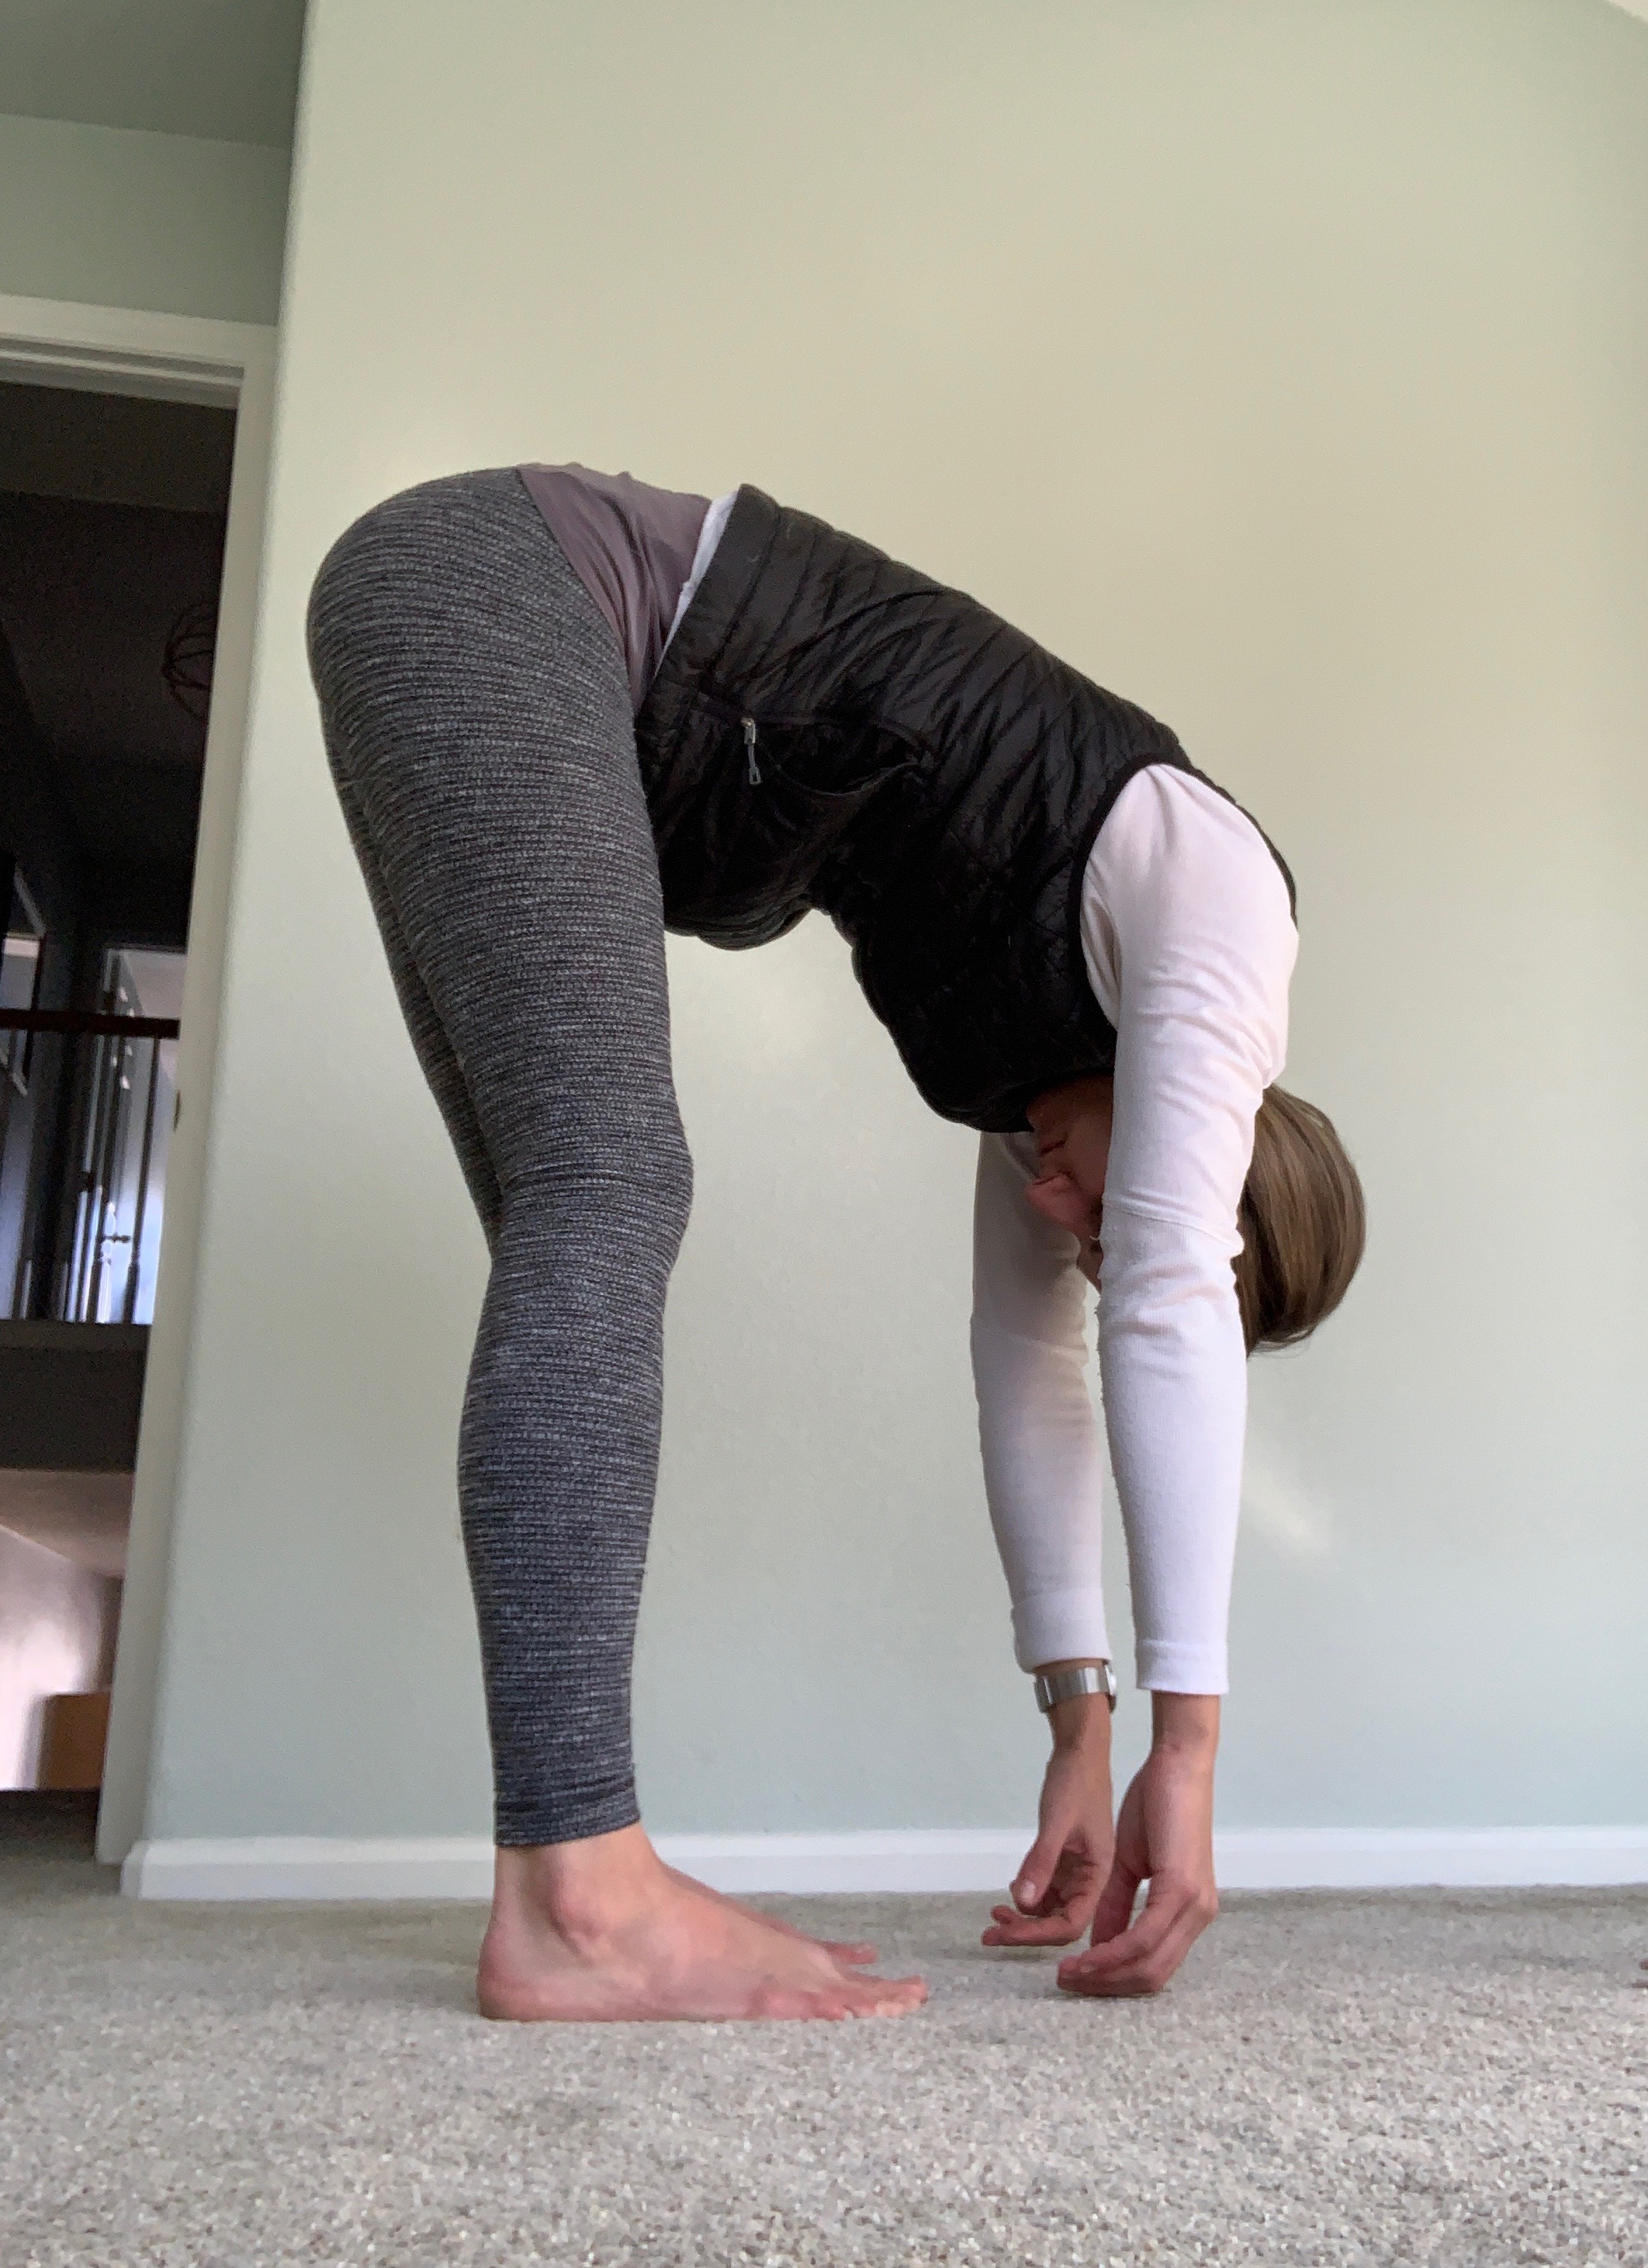
When you’re ready to come up, engage your abdominals and stack up your spine starting with the tailbone and letting your head come up last.
For next time, prevention is the best cure.
To support and protect your back next time you shovel, engage your abdominals and pelvic floor while shoveling. You might even warm up before you go outside by doing an exercise like the 100’s or a forearm plank.
As you start shoveling, try and get in the habit of engaging your abdominals and pelvic floor as you exhale. When you breathe out, think of pulling your navel and all of your abdominal muscles in towards your spine. Simultaneously practice the pelvic brace Lea Klein talks about in this post. Use your breathe to your advantage: exhale sharply (engage the abs and pelvic floor) as you lift and move a shovel full of snow.
Engaging your abdominals may not save you from back soreness entirely, but hopefully it alleviates some of your post-shoveling discomfort.
Need more support? Check out these 5 exercises to do at home. And next time you’re in class, ask us for more on how to rehab from shoveling. Chances are you won’t be the only one craving relief!